U3Aleathercraft
MARBLING LEATHER
Marbling is something that you can easily do at home and it doesn't need any specialist kit. I would recommend printing on paper first and then when you are confident with the process switch to leather.
So here is what you need if you would like to have a go:
Lots of newspaper or a sheet of plastic to protect your work surface (this can get really messy!)
Shaving foam (the cheapest that you can find)Coloured inks
Cocktail sticks
Some corrugated cardboard
Cartridge paper & Vegetable tanned tooling leather for printing on
A plastic tub
Right, let's get started.
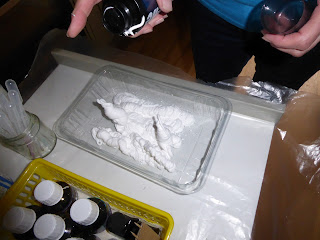
Spray the foam to cover the bottom of the plastic tub. About 1" or 2cms deep will be fine.
Use a straight piece of cardboard to get an even flat surface.
We used a pipette to pick up the drawing ink but you can use a straw or cocktail stick and then tap it so that it splashes onto the foam.
Repeat with a variety of colours. It is best to use a different straw or cocktail stick for each colour.
Cut a piece of carboard so that it is narrower than the width of your plastic tub. Push cocktail sticks in to form a "comb". Lightly drag this through the top of the foam along the length of the tub.
Now make sure you hands are clean and dry before you pick up the piece of paper or leather that you are going to print on.
Slightly curl the paper or leather that you are going to print and lay it face down on top of the foam so that you don't trap any air underneath. Then gently lift off.
Scrap off the excess foam and pat it gently with kitchen towel to remove any excess BUT don't drag or rub it.
Put aside to dry for 10 minutes.
Job done. One leather bookmark finished with a layer of beeswax (Aussie).


Comments
Post a Comment