Posts

Showing posts from March, 2021

Using a Resist & Antique Gel

Image
Following on from carving a coaster this time I want to show you how to use a resist to produce three shades from just one application of antique gel. You are going to need a small clean paintbrush, some clean paper to cover your work area to absorb any splashes, water, kitchen towel, gloves, resist (I am using Supersheen  but you can use watered down PVA) a dauber and Eco Flo Antique Gel (I am using Mahogany). Before you start take a sheet of kitchen towel and wet one corner. If you accidently splash even a tiny speck of resist you need to immediately blot it with the wet kitchen towel and if you don't do it immediately it will be too late and you wont be able to remove it. Working in a good light paint a thin layer of resist onto those areas you want to remain lighter in colour. I have deliberately put a small spot of resist on to the outer border to show you just how much it will show up later on. By the time you have completed one layer you can immediately apply a second and th

Carving a coaster

Image
This is the exercise that we give leathercrafters as their introduction to leather carving.  These are the main tools that I will be using for this exercise. A pattern printed on a folded piece of computer paper, a swivel knife, quartz block, 6 craft tools - beveller, pear shader, camouflage, veiner, seeder and background tool. Mallet and finally a piece of vegetable tanned tooling leather. Not shown are a stylus (an old empty biro works just as well, a wet sponge and a leather strop). Let's start by placing the paper pattern on top of the damp leather. The paper is folded so that the damp doesn't penetrate the top sheet and cause the stylus to tear it while I trace the pattern onto the leather.  You could use a layer of greaseproof paper instead or use a plastic Craftaid (but mine is locked up in the Museum of Leathercraft as I wasn't expecting lockdown to last this long.) Keep your finger on the paper at all time to prevent it moving. You can check that you have transferr

Faux Stitching & Basketweave Stamping

Image
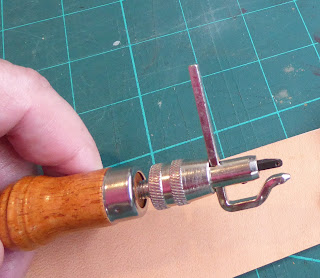
This time I want to look at two decorative techniques. Faux stitching is great for decorating the edges of belts or other items. Basketweave stamping is a great effect on bags, wallets and belts and is really simple to do. Both of these techniques need you to use vegetable tanned tooling leather. Faux stitching  Equipment needed - a groover and a pricking wheel also called a stitching wheel. Groovers are adjustable - this one by unscrewing the knurled collar. You can also take the blade out and feed in in from the other side to make it useable for left handed crafters.  Other versions are adjusted using a screw in the tip of the tool. Pricking wheels come in different pitches giving you fewer stitches per inch. I will be writing a blog about sewing techniques in the future and I will explain more about them then. For now just pick whichever one you have access to. It is best to work on dry leather with a groover as the blade will cut better and the tool is less likely to burr the edge

Dragon Eyes

Image
I have been asked how to create the dragon eyes that I have used in my leathercraft for keyfobs and book covers. You will need some of those domed shaped glass beads that are used to fill vases. I did try using coloured beads but the painting on the back doesn't show through. You will also need to use a paint brush with a fine point. I am using the shorter one today but the longer haired ones work better as they hold more paint. I am using Humbrol enamel paints but acrylic paints work too. We are going to be painting on the back of the bead so we will be painting "backwards" that is we are going to start with the highlights and then work outwards from there. Don't worry if you make a mistake - just have a cloth handy to wipe it off and try again. So let's start with the white highlight. This is just a coma shape and it's what gives the eye it's character. I have painted a few on my practice board just to show you some examples. Now it's time for the re