Faux Stitching & Basketweave Stamping
This time I want to look at two decorative techniques. Faux stitching is great for decorating the edges of belts or other items. Basketweave stamping is a great effect on bags, wallets and belts and is really simple to do. Both of these techniques need you to use vegetable tanned tooling leather.
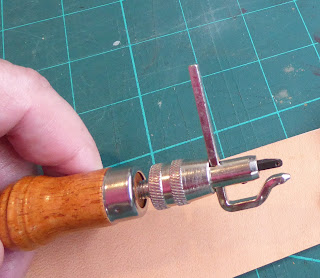
Groovers are adjustable - this one by unscrewing the knurled collar. You can also take the blade out and feed in in from the other side to make it useable for left handed crafters.
Other versions are adjusted using a screw in the tip of the tool.
The blade works best at a 45 degree angle to the face of the leather. The guide will keep the blade exactly the chosen distance from the edge and will follow the inside or outside of a curve. Don't try to "steer" the blade keep the guide up against the edge of the leather.
Take you time - don't rush it. On a longer item, like a belt, if you need to stop and move the leather or your feet just go back a bit and pick up the groove.
When you have finished putting in all the grooves case (wet) your leather with a sponge or spray. Wet the whole piece not just the groove or you will end up with a watermark.
Slowly run your pricking wheel along the groove making sure to keep your finger out of the way of the teeth.
It should be at the speed of one or two teeth at a time.
If you need to stop to move the leather along then align the teeth with the last two marks that you made.
That's faux stitching.
Basketweave
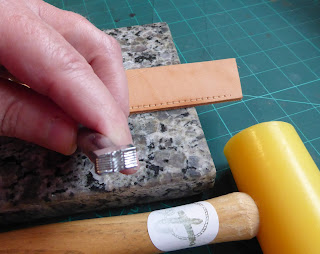
Equipment needed - basketweave stamps are available in different sizes. I am using a Tandy /Ivan X510, a mallet, a scratch awl or a stylus, a straight edge and a quartz block.
Never use a metal hammer with a metal tool - it will burr the top of the tool.
Wooden, polythene or rawhide mallets are best and for stamping use one that isn't too heavy so you don't get fatigued and you keep control.
The first mark I made didn't show up in the photo so it does not need to be this deep but as it gets covered up by the stamping it really doesn't matter.
first impression. To get a really clear stamp you might need to hit it 4 times more tipping the tool very slightly forward, then back then left then right.
Now you can use the impressions to work the pattern all along the belt or piece of work.
I find it easier as a right handed person to stamp from right to left and then turn the leather round to avoid working left to right. But that might just be me. See what works for you.
And there you have it!


Comments
Post a Comment