Carving a coaster
This is the exercise that we give leathercrafters as their introduction to leather carving.
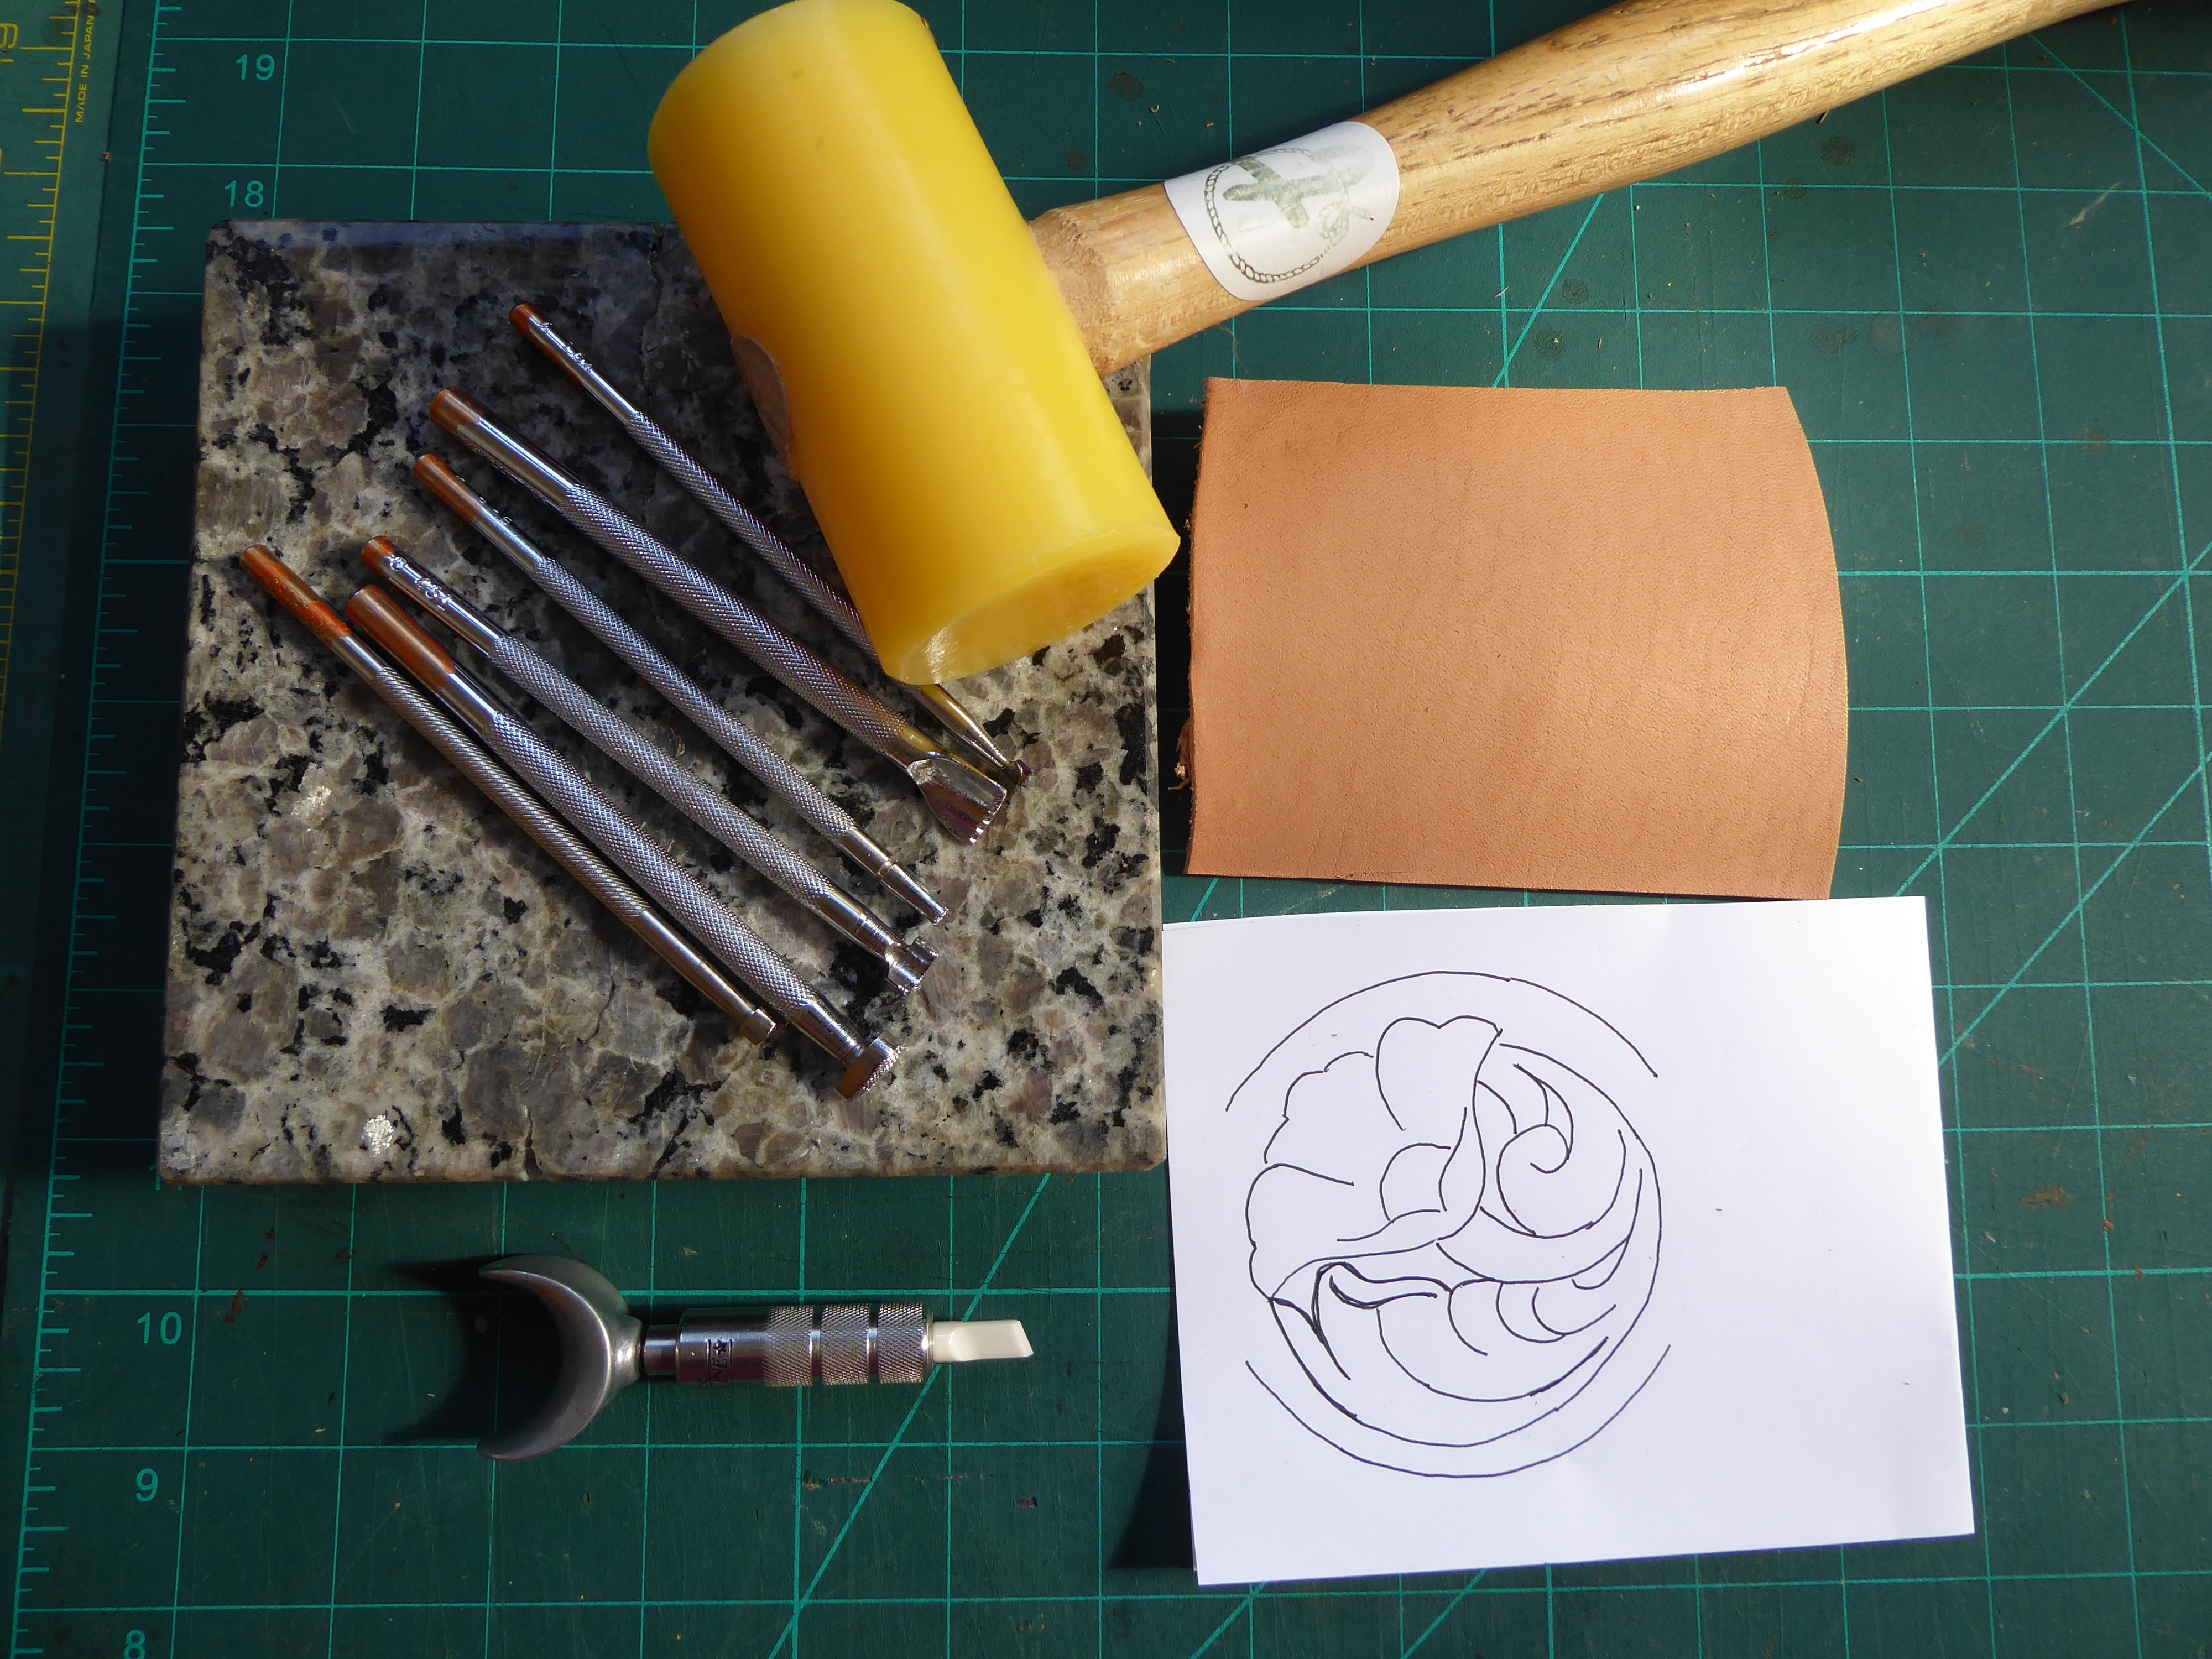
A pattern printed on a folded piece of computer paper, a swivel knife, quartz block, 6 craft tools - beveller, pear shader, camouflage, veiner, seeder and background tool. Mallet and finally a piece of vegetable tanned tooling leather.
Not shown are a stylus (an old empty biro works just as well, a wet sponge and a leather strop).

Let's start by placing the paper pattern on top of the damp leather. The paper is folded so that the damp doesn't penetrate the top sheet and cause the stylus to tear it while I trace the pattern onto the leather.
You could use a layer of greaseproof paper instead or use a plastic Craftaid (but mine is locked up in the Museum of Leathercraft as I wasn't expecting lockdown to last this long.)

Notice that I have used a fairly firm pressure but not pushed so hard that I have torn through the paper.
 Next step is to strop the blade of my swivel knife. A strop can be made from a scrap piece of tooling leather or an old business card with jewelers rouge rubbed into it. The blade I am using is a ceramic filigree and all I am doing is polishing off any debris.

yoke or saddle (rather than the death grip that you will too often see me using). This will allow the knife to swivel freely creating lovely flowing lines, very like a paint brush. The knife must be held at 90 degrees to the leather to prevent undercutting and the blade is tipped slightly forward on its tip.

Check that the leather is damp enough by placing the back of your hand on it. It should feel cold to the touch.
Where two lines meet carve away from the line then turn the leather round and carve back to join up the line. How deep should the cut be? Deep enough that you can feel it with the tip of the beveller tool.

Where the line needs to slowly fade out then gently ease up the pressure on your fingertip.
There is one line that I haven't cut and that is the semi circle inside the flower. On patterns this will be shown as a dotted line and is used as a guide line only for the petal tool as you will see later.

You use the thicker end of the wedge shape and tip it forward slightly.
Feel the line you have cut and move the beveller back and forward along the line as you tap it with the mallet.

you aren't knocking in nails. After a while you can tell by the sound that you are hitting it squarely. Also if you are hitting it at angle you will find the head of the craftool pushed out of your grasp.


Start by striking it slightly harder that you were hitting the beveller. The bigger the surface area the harder you hit it, the smaller the surface area the lighter you tap it.
 Start with a single strike then tip it forward onto its narrower tip and tapping move the tool to create the shape you want. We are trying to make a shape like a comma.


Using the very tip I have made a single impression on each of the smaller leaves as well.


It is used for the other side of the broad leaf.


Don't over work the area or you will end up with mashed leather. try for consistent pressure and vary the position of the tool as you work.

There are lots of videos on YouTube that you can watch - try starting with this one


Comments
Post a Comment