This time I want to show you that you can produce some really effective carving using just two tools - a swivel knife and a modelling spoon.
I have cut to size a panel of 2mm vegetable tanned tooling leather. Having cased it (a technical term for wetting it with either a damp sponge or a plant mister) and allowed the water to soak in from the surface it is time to transfer the design that I will be working on today. This is based on a Canadian First Nation design printed on to ordinary computer paper. I have placed a sheet of greaseproof paper between the damp leather and the computer paper to avoid tearing the paper as I trace using a stylus. I keep the paper from moving with a weight on the top left corner. This also allows me to flick the paper back and forth just to check that I have traced all the lines.
I give my swivel knife a quick strop and then it's time to start cutting.Remembering to keep the swivel knife tipped slightly forward onto its point and upright to avoid undercutting the surface of the leather.
I tried taking a photo of myself doing this but holding a camera with one hand the swivel knife in the other while carving proved impossible.
Once all the lines have been cut you may want to take a break. So here's my next tip - rather than let the leather dry out again either cover it with cling film or if you have a suitable piece of glass to hand cover it with that. The problem with constantly re-casing the leather too often is that the tanning starts to be leeched out of the leather.I am using a rounded modelling spoon to do the beveling but feel free to use whichever shape you are most comfortable with.
Holding the spoon like a pen and at 45 degrees you will need to push down with a bit of force so don't try to go too quickly and you way need to go back and forth to get the impression that you want.Keep rotating the leather so that your hand and wrist are in a comfortable position.
I use a piece of leather to lean on to avoid marking the cased leather at this stage it will mark very easily.
With the carving and beveling completed it is time to have a break and a cup of tea. Did you know that a really strong pot of tea contains enough tannin to tan the skin of a mouse? Not sure why you need to know that.
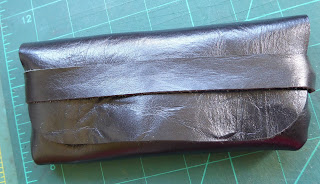
The finished piece was dyed using saddle tan antique gel and the branch was then painted using Cova colour acrylic. The edges of the panel were skived down to a feather edge. Finally the whole thing was give two coats of Aussie beeswax and stuck onto my folder using contact cement.Amazing what you can do with just two tools.


This comment has been removed by the author.
ReplyDelete