Keyfob

You will need:
 Mark the centre point 3" in from one end and mark half an inch either side of the centre. Repeat on the opposite edge. Mark half an inch in from both edges to form a triangle.
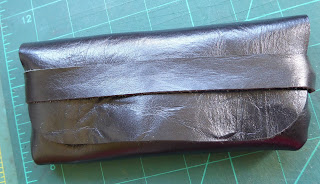
- A piece of tooling leather cut to six inches by one and a half inches
- Water in a spray or with a sponge
- An English Point end punch
- Wing dividers
- 4 pronged diamond stitching chisel or pricking iron
- Stamp and stamp handle
- Double sided tape
- 2 large harness needles size 000
- Thread
- Stitching pony
- Split ring

This will give you the points on which to place the English Point end punch.

and upright hit the punch hard.
Assuming you had sufficient Shredded Wheat for breakfast the scrap piece will separate from the main piece. Otherwise keep striking the punch until it does the job. Repeat on the other edge.
if you don't have a strap end punch you can cut it out using a craft knife.

Allow the water to be absorbed.


leather.
Take a close look at this photo and you will see that one point is off the leather while the other marks the line.
Remember to stop approximately an eighth of an inch before the end.

Now mark the end stitch line starting an eighth of an inch in and stop when it joins your
original line.
original line.

Now choose the stamps that you want to use to decorate your keyfob.

impression from the stamp.
If you look closely at the stamp you will see that the numbers on the stamp should face towards you to ensure that the design is the right way up. We have marked the bottom edges of many of the stamps with nail varnish so that it is always clear which way up the stamp needs to be used.

It helps to stand up while you hit the stamp handle. Start off with the mallet in contact with the handle, raise the mallet and strike hard.
Make sure that the stamp doesn't move and then hit the handle 4 more times putting slight pressure on the left then the right, then up and finally down to ensure that you get a really clear impression.

Now stamp the other end.

attach two pieces of double sided tape to keep the two halves aligned while we punch the stitching holes.
You will notice that I have placed the tape some way in to avoid the stitching line otherwise the glue from the tape can snag the thread as it passes through the leather.
Align the two ends of the fob and stick down so that the edges and end are in line.

I am using what Tandy calls a 4mm pricking iron but which others call a 6.5mm. This is because Tandy uses the width of the space between the tines whereas other manufacturers use the distance from point to point so be aware of this when you are buying.
Place the iron in one corner and hit it with a mallet. Don't try and get it through with one hit. remove the iron then offer it up and hit it again until it appears on the other side.

It is important that the hole is exactly in the corner otherwise when you stitch the thread will cut the corner and be at a diagonal.

Saddle stitch needs two harness needles - I am using the large 000 harness needles from Tandy.


Then pull on the longer thread to secure it to the needle.

Place the keyfob in the stitching pony and push the needles through the first and second holes. Pull both threads evenly to their furthest extent.

Take the needle that went through the first holes and bring it back through the second hole.
Pull it all the way through and then pull on both threads with an even tension to complete the stitch.
With the needle that you have just pulled through the second hole push it through the third hole.

Rather than tie a knot at the end back stitch two of the holes with each needle.

The next stage is to burnish the three edges and because I am trying to photograph this I have left the keyfob in the stitching pony to do it but it is just as easy to hold it in your hand.
Either wet the edge with saliva or if you don't fancy that you can use gum traganth - especially useful if you are burnishing a long piece like a belt and you are running short of saliva.

Burnishing binds the fibres of the leather together and seals the edge.

If you have got a burnisher you can also use a denim offcut from a pair of jeans. Use the inside of the fabric otherwise you end up with an indigo stain on your leather.

Your keyfob needs a protective finish and you can either leave it a natural colour protected with Aussie or Supershene or to really bring out the details in the stamped patterns use an Antique Gel - details of using this can be found in the previous blog.
If you would like to see a YouTube video of how to saddle stitch click on this link


Comments
Post a Comment