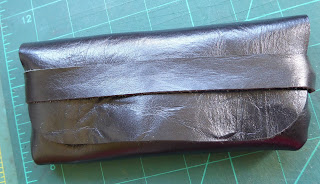
Minimalist wallet


If you are running short of larger pieces of leather you could even make the two inside pieces from a contrasting colour. This is the pattern for the three pieces that you are going to need. The outer is 9 inches by 4 inches. The cash holder is 5 & 3/4 inches by 3 inches. (I have just noticed a mistake in my pattern as there shouldn't be a notch cut in the cash holder). Finally the card holder is 4 inches by 2 and a half inches.

These are the three pieces cut to size. Accurate cutting with exact right angled corners is most important.
If you are using vegetable tanned tooling leather this is the point to stamp any decoration and apply any dyes.

These are the tools that you need and remember if you don't have an English Point punch you can use a craft knife and a coin or old CD. A ruler, a plastic or wooden mallet, waste leather pad, a 4 pronged pricking iron, two harness needles, thread.
Optional tools are double sided tape or bulldog clips, a corner punch and a stitching pony.

I have used a corner punch but on the top right corner of the cash holder. You could use a craft knife and a coin or old CD instead to cut the curve.

With the pieces stuck in place with thin double sided tape or held in place with bulldog clips the next step is to prick the stitching holes. NOTE that there is a gap in the stitching of the bottom edge of the cash holder which I will mark with a piece of yellow paper. Without this gap the inner leather will bulge.

Just like with the keyfob start by punching holes from the corner outwards so the the thread doesn't cut the corner.


The card holder is stitched on three sides.

Use two harness needles and thread that is three times the length of the line to be stitched to stitch the pieces together. I have used a lock stitch to secure each end of the stitching.
I have backstitched two holes rather than use a knot to secure the end of the thread.

punch to make accessing the cards easier.
If you are using vegetable tanned tooling leather you can burnish the edges and then apply a protective finish such as Aussie or Supershene.


Comments
Post a Comment