Mini Boots

Time to have a go at making this miniature boot keyring.


I have used a set of acrylic templates but you could use this paper pattern.


Lay your template onto a piece of finished leather. You can use just about any thickness -
suede, chrome tanned, vegetable tanned - whatever you have available and takes your fancy.

Draw round your pattern using an ordinary Biro on the back of the leather.


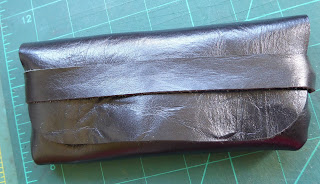
You should have something like this.

Notice that I have marked the back and front centre holes on the sole. The front centre hole on the vamp and the centre hole on the heel as well as the hole for the tag. I have also marked up the lacing holes.


Cutting out can be done with leather cutting shears, a clicking knife or with an ordinary
craft knife.


The four pieces have been cut out and the centre holes pierced with an awl.


I always forget to do this next stage first!

Using a hole punch make the holes in the tag and .......


..... rivet the tag and keyring in place.


Punch the lace holes. Using a large hole punch and a scrap leather pad.


Working out from the centre holes punch the stitching holes using a two pronged pricking iron.


An alternative is to use a pair of compasses to prick the holes then use an awl to enlarge it.


On the heel piece you can use a multipronged pricking iron working out from the centre hole.


Next I have counted from the centre hole on the heel to one edge (marked X) and then counted from the centre hole on the back of the sole and marked a corresponding X.


Then with the vamp I have counted from the centre hole and marked a Y. Then counted from the front centre hole on the sole and marked a Y. When I am sewing the sole to the other pieces it will then be clear when I need to integrate the third piece.


I measure how much thread I am going to need - 3 times the circumference of the sole.


Align the centre hole at the back of the sole with the centre hole in the heel. Push the two needles (this is saddle stitch that we are using) through - one through the centre holes and the other in the hole next to it.

Note that the leathers are flesh side to flesh side (back to back).


Continue stitching until you get to the X marks.

Place the vamp between the heel piece and the sole and stitch through all three layers.


Continue stitching round the vamp. It is at this point that I always panic thinking that I have miscounted. The vamp will bend upwards creating the boot shape and the pieces will actually fit together.


Keep stitching until you get to point Y. Bring the heel part over the vamp and sole.

Continue stitching until .....


... you get back to your starting point.

Now push you needle through a single layer of leather and do the same with the other needle.


Tie the two threads using a reef knot and hide it between the two layers.

Cut off the two threads.


To make a lace take a strip of leather and cut it down the middle but stop 1cm from one end.


Cut to make a rounded end.


Then thread it through the lace holes.

And you have made your first boot.


Comments

Popular posts from this blog

Painted leather leaf

Bits and pieces

Dragon Eyes