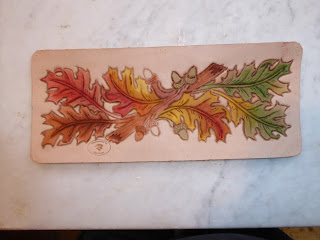
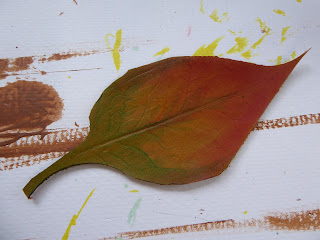
Painted leather leaf
effect using graduated strengths of dye mixed with water.
You could use spirit based dyes mixed with their appropriate thinner instead but the smell gives me a headache.
I dipped it into clean water and went to find a suitable dried leaf. You can use fresh leaves but they tend to crush and only make a faint impression.
leather.
Then I covered it with an old clear plastic pocket. This is optional - if the leaf is robust and not crumbling you don't need to use the plastic.
Holding everything down I pressed firmly down with a modelling spoon rubbing it over every section of the leaf.
I held down one corner and checked that it had left an impression before removing the leaf.
If you want to make the veins more prominent you can very gently use a stylus or a very, very light touch from a swivel knife. This leaf didn't really need it but just to show you what it looks like I have used a stylus on some of the veins.
I left the centre spine as it was as just accentuated the veins a little bit. Don't overdo it as they need to look light and delicate rather than as if they have been sun bathing in St Tropez for the last 40 years.
Please wear gloves (I'm looking at you Dolli) although you are using water based dyes they are intended to penetrate leather and leather is made from skin. So unless you really want multicoloured skin for a week please use gloves.
You need a brush, some water, dyes and a palette to mix them with water. (Thank you Hotel Chocolat for these trays the Florentines were delicious).
Flo dye and I find that when it dries it is pale enough already.
Next I rinse the brush in water and then put 10 brush loads of water into my palette with one
brush load of red dye.
Mix them together.
don't need gloves?
Now paint a little of the red dye mixed with water just to the top of the leaf leaving the an area of the yellow in the middle.
Don't be tempted to overdo it. You can always add more later but you can't take it away.
The green dye is very strong so I use 15 brush loads of water to 1 brush load of green.
I painted this in the bottom part of the leaf leaving an area of yellow in the middle but overlapping the red slightly up each side.
Now that it has fully dried you can judge the dye penetration much better.
If you wanted to achieve really subtle graduations of colour you can repeat this stage with progressively stronger mixtures working outwards.
This needs to dry fully before receiving a protective coat of Supershene or Aussie wax.
This technique takes a bit of patience as it is tempting to rush in with the next layer before the first has dried fully.
But otherwise there is no secret to getting a visually effective piece of work.


Lovely x
ReplyDeleteThanks Kelly
Delete