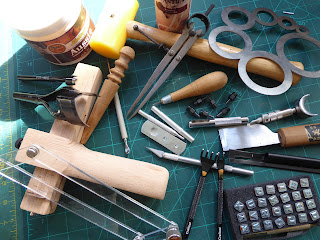
What do these do? What are they called?
The first tools that you will probably need to use are the ones we use for cutting out your pieces of leather.
These are a folding Stanley knife or box cutter
A craft knife
A pair of leather cutting scissors or shears. Note the blunt ends which allow you to cut into corners and right to the end of the blade.
Another cutting tool that you will use to straighten the edges of two pieces of leather sewn together is the Japanese knife.
It can also be used as a skiver.
A much safer option for skivving is the Safety Beveller.
This has a curved end and is best used at a 45 degree angle to the edge that you are skivving.
Make sure that the leather is dry before you start skivving to get a really clean cut.
Those shavings can come in handy if chopped up and used with PVA glue you can make leather mache to fill gaps in your work.
This is the tool to use when cutting a strap or belt and is unsurprisingly called a strap cutter.
The one on the right is for cutting an English Point or "church window" end punch. We only have one size so just mark the centre of your strap or belt and position the point on the centre mark.
Using an English Point strap end punch - making a keyfob
Next we come to the tools for making the holes needed for hand stitching.
From left to right these are a 2 and a 4 pronged diamond pricking iron. "Diamond" just describes the shape of the hole that they make.
Link to using a pricking iron - making a keyfob

A set of snap setting tools. Again used with a non metal mallet.
Link to making a small purse showing how to use a snap setter.
This is a stamp guide mostly used with letter and number stamps. The stamps are lined up in
position before stamping commences. I have marked the bottom of each letter and number stamp so that you can make sure that they are the right way round. You can use place holder stamps for duplicate letter (such as the second A in ALAN) by placing a spare letter upside down so that it is clear that it needs replacing before you hit it.
A stylus is used to mark lines on damp leather or you can press harder to make a point on dry leather. If you haven't got a stylus you can use a "dead" ballpoint pen.
Finally - leather. Not a tool but the most important material.
This is a piece of vegetable tanned tooling leather.
On the left is the flesh side and on the right is the grain side.


Comments
Post a Comment